Improving WordPress security
WordPress is the most popular website software application, and one of the reasons is the wide range of themes and plugins which extend its capabilities. This makes WordPress a pretty enticing target for hacker attacks, so taking measures to secure it is strongly recommended. You can perform four simple actions via the hosting Control Panel > WordPress Manager that are very effective and should help you prevent the majority of hacking attempts against your website:
- Update WordPress and its components regularly
- Access WordPress via HTTPS (use SSL)
- Apply an additional layer of protection to the WordPress Dashboard
- Prevent execution of PHP scripts in folders with website content
- Disable access to XML-RPC
Update WordPress and its components regularly
Software applications which are actively worked on receive regular updates to introduce new features to their customers, apply security fixes, or resolve compatibility issues. With WordPress, there are updates for literally everything (the WordPress core, all installed themes, and all installed plugins), and you have to apply them regularly to have the best defense possible against vulnerability exploits.
One solution is to activate automatic updates for the WordPress core, themes, and plugins; however, this may result in unexpected downtime of your website if any of the automatic updates causes your website to malfunction or not work correctly. That is why we would recommend that you regularly and manually check the WordPress core, themes, and plugins for updates. You can find more details about the available update options for WordPress themes and plugins in the How to update a WordPress theme? section of our Managing WordPress themes article and the How to update a WordPress plugin? section of our Managing WordPress plugins article.
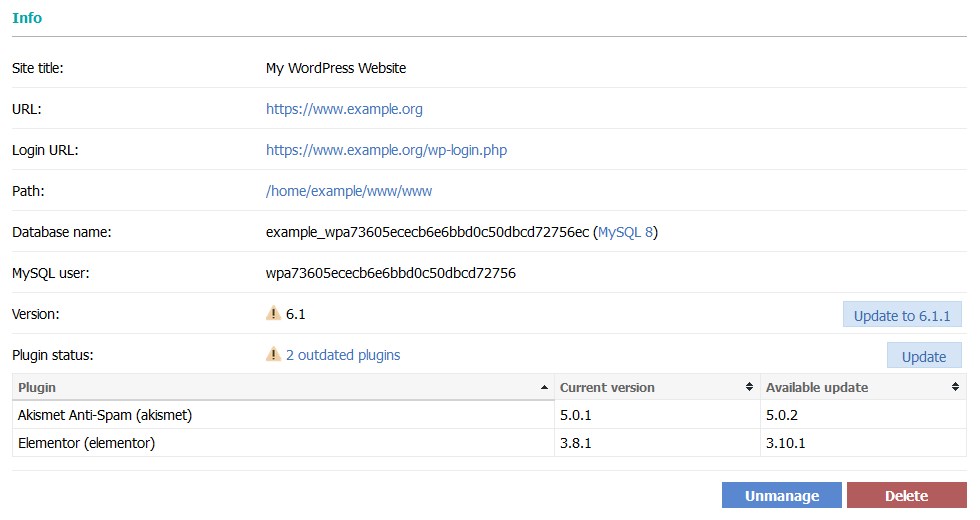
You can update the WordPress core and all outdated plugins via the hosting Control Panel > WordPress Manager by simply opening the management page for your WordPress installation and pressing the respective Update buttons which will be displayed if updates are available.
Access WordPress via HTTPS (use SSL)
By installing an SSL certificate on the server and configuring WordPress to work via HTTPS, all data will be transmitted securely between the browser of your website visitors and the server hosting your website. This will help against man-in-the-middle attacks. You can find step-by-step instructions how to do this the right way via the hosting Control Panel > WordPress Manager in our Forcing HTTPS for WordPress article. If a certificate is already available for the subdomain WordPress is installed on, this will be displayed in the Security section of the WordPress Manager. If a certificate is not available, clicking on the Manage button will take you to the SSL/HTTPS section of the Control Panel where you can enable a free SSL certificate from Let's Encrypt.

Apply an additional layer of protection to the WordPress Dashboard
Hackers often try to brute-force their way into the WordPress Dashboard, so having a strong password for all administrators of your WordPress website is a must. Details on how to easily change the passwords of WordPress administrators are available in our Managing WordPress administrators article. On our servers, a Web Application Firewall (WAF) helps significantly with the prevention of most attacks. It attempts to filter out abusive traffic and allow only legitimate traffic; however, some brute-force attack (especially slow and/or distributed) are indistinguishable from legitimate traffic, so the WAF may not block them correctly. More information about the WAF available on our servers can be found in the Error "412 Precondition Failed" (mod_security2) article from our online documentation.
What you can do to prevent such brute-force attempts altogether is to password protect the wp-login.php file (used for accessing the WordPress Dashboard), which takes just a few steps:
- Open the management page for the WordPress installation by clicking on the Manage button for it in the hosting Control Panel > WordPress Manager.
- Scroll down to the Tools section, and click on the Manage button next to Dashboard login protection.

- You will be redirected to the hosting Control Panel > Protection > Web access protection > Password protection page for the wp-login.php file in your WordPress directory. Choose a username and a password in the form that will be displayed there. We strongly recommend that you use a username that is hard to guess and not associated with your name, hosting account, or website, and that you choose a password after checking our Password tips article with general information on how to choose a strong password and secure it. You can add multiple username/password combinations using that form. A list of all authenticated users will be listed below the form with an option to change their password or delete them.
- Press the Add button.

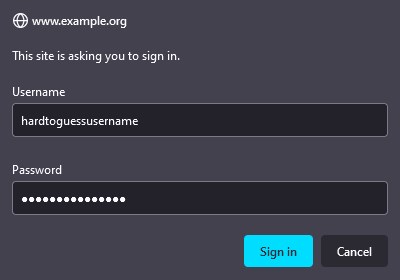
Now, anyone that tries to open the login page of your WordPress Dashboard (the wp-login.php file of your WordPress installation) via a browser will have to supply a combination of a valid username and password (those from the configured password protection):
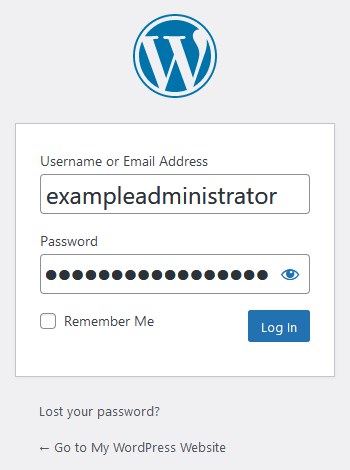
After successfully authenticating with a valid username and password in the pop-up screen, the login page of the WordPress Dashboard will be displayed where the WordPress user credentials can be entered:
As you can see, this will require any brute-force attacks to break two different username-password combinations to gain access to your WordPress Dashboard. This process should take a lot of time and processing power, so it should be a good enough reason for brute-force attack initiators to give up on your website.
Important: This extra layer of protection will affect ALL users registered on your WordPress website, so you will need to provide the additional set of credentials to them as otherwise they will be unable to reach the login page and access the WordPress Dashboard. If your website relies on having a lot of visitors or users to be logged in, this type of protection may not be the best solution for you, and we would suggest that you look for a plugin that offers similar protection.
Prevent execution of PHP scripts in folders with website content
Some vulnerabilities allow hackers to upload files in the wp-admin/includes, wp-content/uploads, and wp-includes directories of a WordPress installation. Hackers try to use this to their advantage by uploading malicious PHP files and trying to execute these files directly. A simple way to stop such attempts in their tracks is to prevent the execution of PHP files in the said folders. The WordPress Manager allows you to do it easily with a click of a button - all you need to do is:
- Go to the hosting Control Panel > WordPress Manager and click on the Manage button for your WordPress installation.
- Now, you will be inside the management page for your WordPress installation. Navigate to the Tools section there, and click on the Apply button next to Secure content directories.

This will add the following code block to the .htaccess files in the wp-admin/includes, wp-content/uploads, and wp-includes directories of your WordPress installation (the WordPress Manager will create the .htaccess files if they do not exist):
# BEGIN rules managed by Control Panel > WordPress
### BEGIN PHP Security rules enabled via Control Panel > WordPress ###
Options -Indexes -ExecCGI
# Execution prevention
<Files ~ "\.ph(?:p[345]?|t|tml)$">
deny from all
</Files>
#### END PHP Security rules enabled via Control Panel > WordPress ####
# END rules managed by Control Panel > WordPress
Important: Some plugins or themes may rely on the web execution of PHP files located in the folders mentioned here, which will cause these plugins/themes to stop working correctly. If that happens, you should remove the code block added by the Secure content directories tool manually or use another theme/plugin that offers the same functionality but executes files only from its respective directory within the wp-content/plugins directory of your WordPress installation.
Disable access to XML-RPC
XML-RPC is a WordPress feature that allows WordPress to communicate with other systems when necessary. Most of the time, this feature is not required, and is often exploited by hackers. By default, access to XML-RPC in WordPress is disabled on our servers. However, you can manage access to XML-RPC in WordPress through the Security section in the WordPress Manager. Access to XML-RPC is sometimes required by some plugins. If you have such a requirement, you need to click the Enable button next to the Access to XML-RPC security option to enable access to XML-RPC. If access to XML-RPC has been enabled, you can disable it again by clicking on the Disable button next to the security option.
