Forcing HTTPS for WordPress
Most modern browsers will display some sort of a warninig if a website is not accessed over a secure connection. This article will guide you on how to switch your WordPress URL to use HTTPS. Using a secure connection (HTTPS) improves security by encrypting all data between the server and the browser of a vistior. This also builds trust in visitors and allows browsers to display the green padlock next to your site's address in the address bar of the browser.
Prerequisites
It is only possible to force HTTPS for a WordPress installation if there is a valid SSL certificate installed for its domain/subdomain.
If an SSL certificate is installed for the subdomain your WordPress installation is on, this will be displayed in the Security section of the WordPress Manager in the Control Panel of the account:

If a certificate is not available, you can click on the Manage button next to the SSL Certificate (HTTPS) security option. You can enable a free Let's Encrypt certificate with a single click using the SSL/HTTPS -> Let's Encrypt certificates section of the Control Panel as described in our Let's Encrypt certificates article.
Switching WordPress to HTTPS
You can use the WordPress Manager in the hosting Control Panel to force HTTPS for a WordPress installation by following the steps below:
- Access the hosting Control Panel.
- Navigate to the WordPress Manager.
- Find the WordPress installation in the list, and click on the Manage button next to it. This will take you to the management page for the WordPress installation.
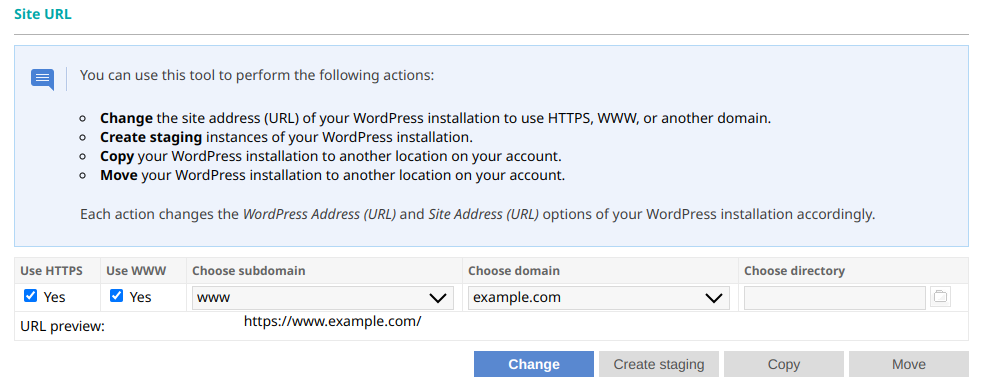
- Find the Site URL section and select the Yes checkbox under Use HTTPS.
- Click on the Change button.

When you force HTTPS for WordPress, the tool performs the following actions:
- Creates a temporary backup of the WordPress installation for quick and easy restoration in case of problems. For more information, you can check our Creating, downloading, and restoring from WordPress backups article.
- Changes the Site URL (WordPress Address) setting.
- Changes the Home (Site Address) setting.
- Replaces the current address with the new address in the database.
Note: If there are any hard-coded links of the website's URL in the WordPress files, you will need to update them manually.