Using Two-factor Authentication (2FA)
Two-factor authentication (2FA) adds extra security to your Webmail. With 2FA enabled, you will need to enter a security token when you log in, along with your password. The tokens are time-based, and can be generated by any 2FA token application installed on a phone, tablet, computer, or smartwatch.
If you only use Webmail to access your email, we recommend taking advantage of both Two-Factor Authentication (2FA) and disabling Non-Webmail Access to maximize the security of your mailboxes.
The two-factor authentication (2FA) can only be enabled via the Webmail Classic and Roundcube interfaces. You can enable 2FA by following these steps depending on your webmail client of choice:
Roundcube
1. Log in to the Roundcube interface with the email account which you are looking to activate 2FA for.
2. Navigate to the Settings menu > Two-factor Authentication.
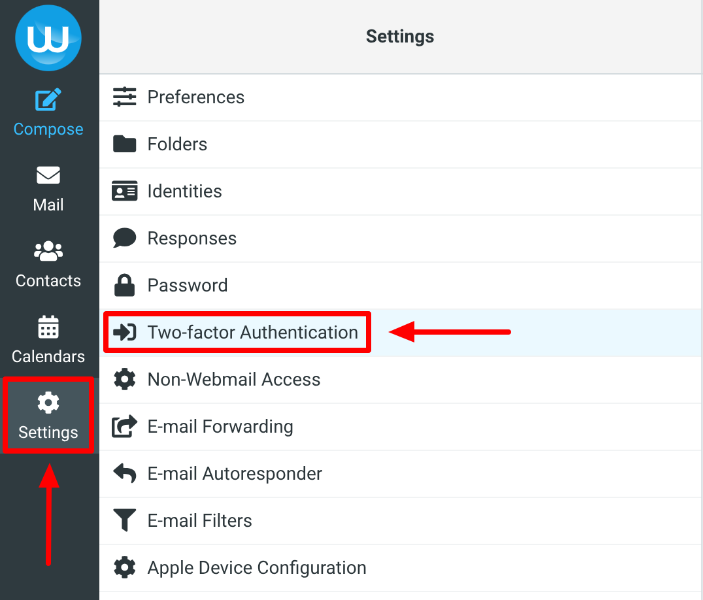
3. Press the Enable button next to "Two-factor authentication is disabled".
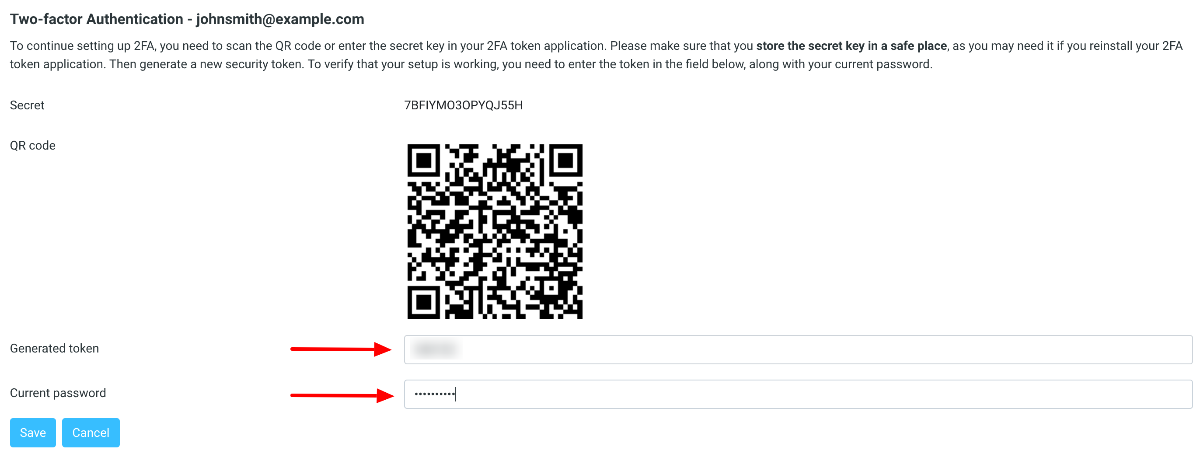
4. Scan the QR code or enter the Secret (key) in your 2FA token application. Instructions on using Google Authenticator and Apple Passwords can be found at the Two-factor authentication (2FA) for the hosting Control Panel section. Please make sure that you store the secret key in a safe place, as you may need it if you reinstall your 2FA token application.
5. Enter the token (verification code) generated by your 2FA token application at the Generated token field and your Current password, and press the Save button.
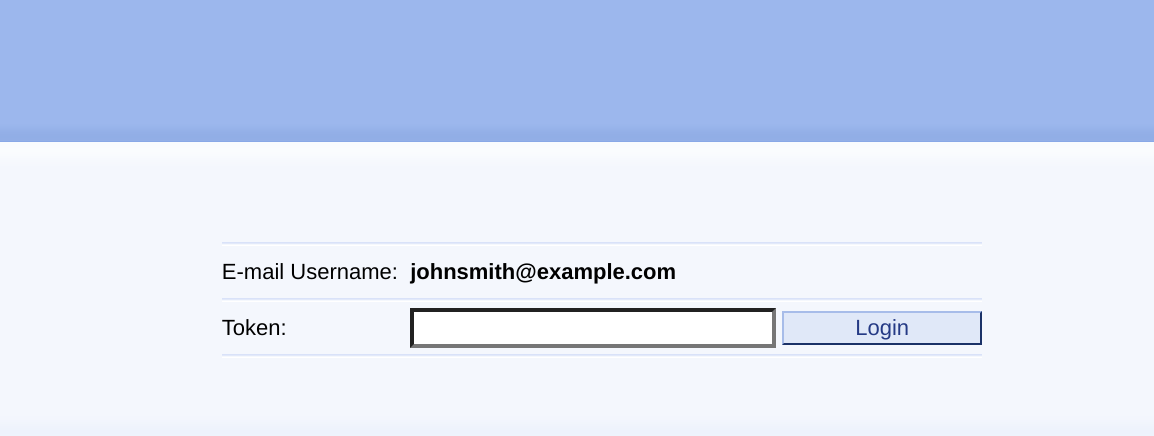
Subsequent login attempts via Roundcube will require entering the token generated by the 2FA application you've used during setup.

To disable 2FA in Roundcube Webmail, navigate to Settings > Two-factor Authentication and click Disable. You will have to enter the token generated by your 2FA application, as well as the current mailbox password.
You can also disable 2FA via the hosting Control Panel > Mail Manager > Security button next to the mailbox > Disable button in the Two-factor authentication section. You will not be asked to provide a token or type the mailbox password if you choose to disable 2FA this way.
Webmail Classic
1. Log in to the Webmail Classic interface with the email account which you are looking to activate 2FA for.
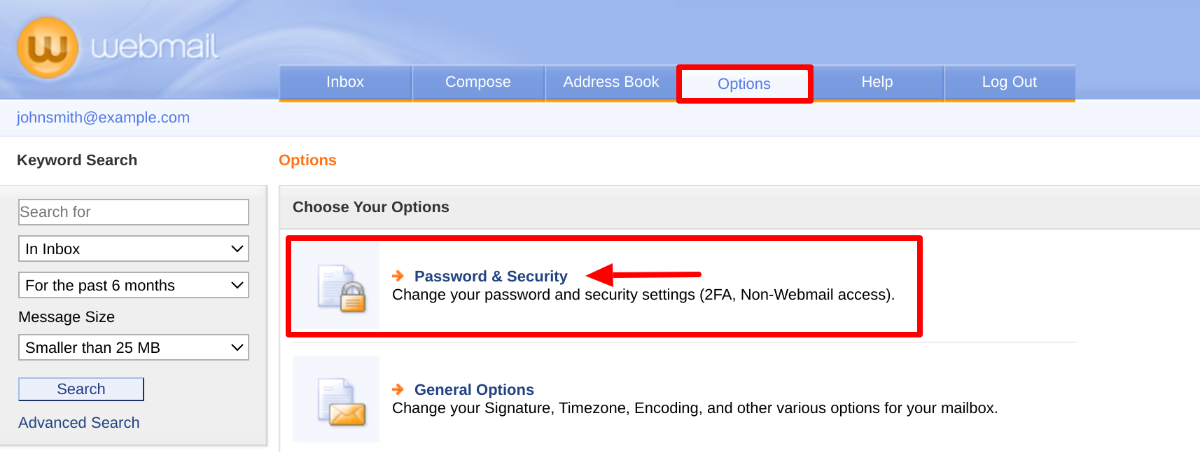
2. Navigate to the Options tab > Password & Security.
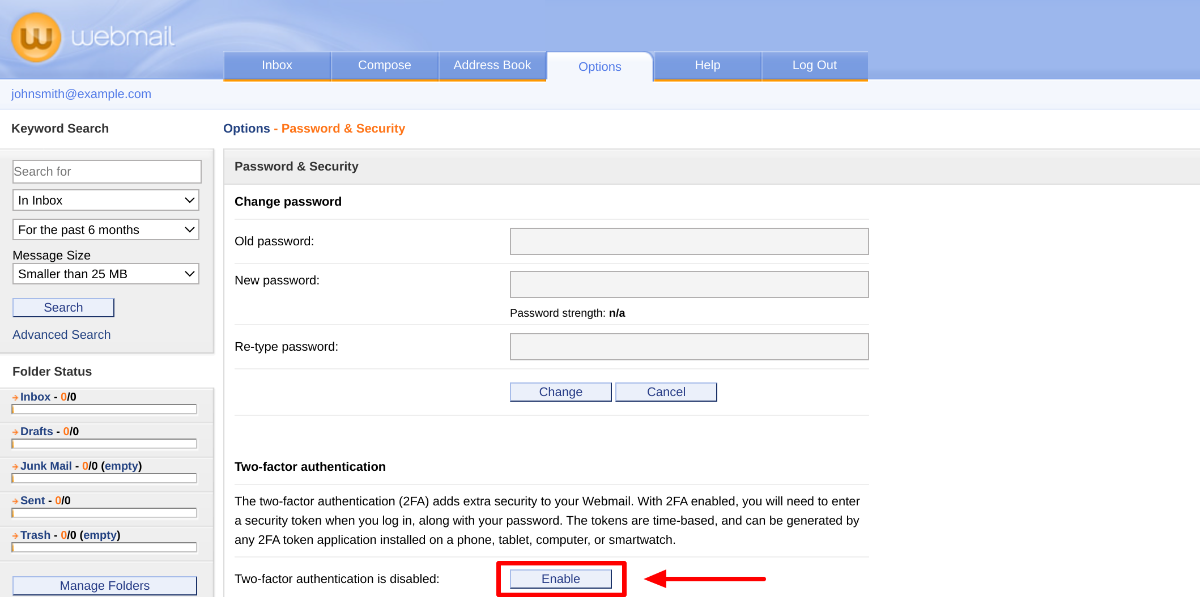
3. Press the Enable button under Two-factor authentication.
4. Scan the QR code or enter the secret key in your 2FA token application. Instructions on using Google Authenticator and Apple Passwords can be found at the Two-factor authentication (2FA) for the hosting Control Panel section. Please make sure that you store the secret key in a safe place, as you may need it if you reinstall your 2FA token application.
5. Enter the token (verification code) generated by your 2FA token application at the Generated token field and your Current password, and press the Enable button.
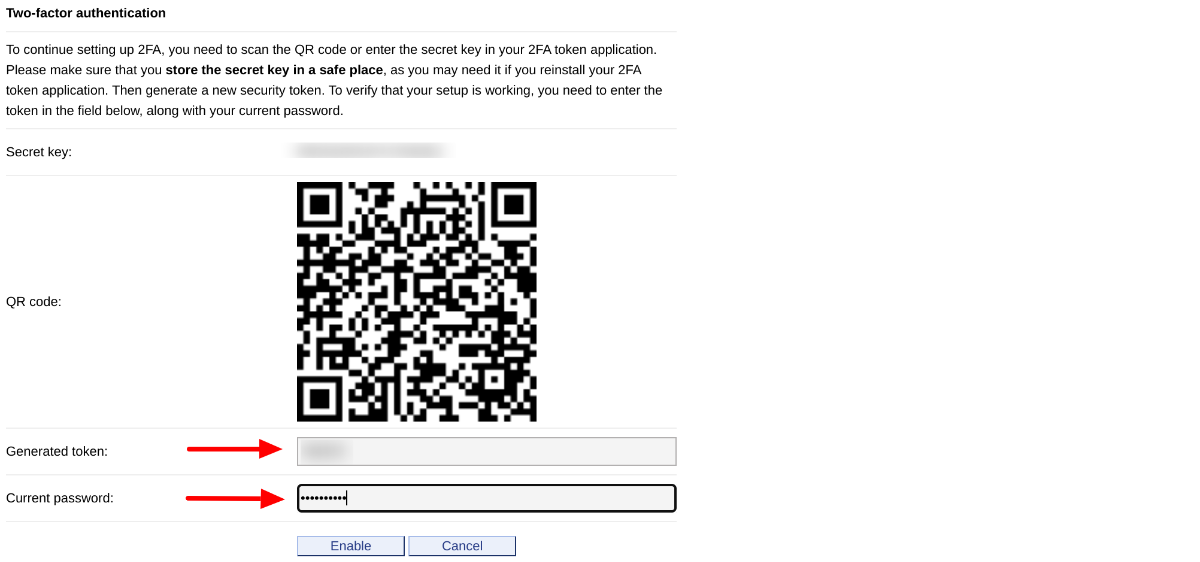
You will receive a confirmation message "The two-factor authentication has been enabled successfully.". Subsequent login attempts via Webmail Classic will require entering the token generated by the 2FA application you've used during setup.
To disable 2FA in Webmail Classic, navigate to Options > Password & Security and click Disable under Two-factor Authentication. You will need to enter the token generated by your 2FA application and the current mailbox password.
You can also disable 2FA via the hosting Control Panel > Mail Manager > Security button next to the mailbox > Disable button in the Two-factor authentication section. You will not have to provide a token or type the mailbox password to disable 2FA this way.