SSL Certificates
You can use this section of the hosting Control Panel to install and manage your SSL certificates installed on the account.
Installing an SSL certificate from a third-party provider
If you have bought an SSL certificate from a third-party provider, the process of issuing it and installing it on our server is the following:
- Go to the SSL/HTTPS section.
- Click on the Import SSL Certificate button from the top-right corner of the SSL certificates list.
- Enter the content of the Private Key, Certificate, and Intermediate certificates files or upload them using the available controls.
- Click on the Submit button.
- Enable the SSL certificate using by clicking on the gear icon button from the Actions column next to your domain and selecting the Enable option. This will activate it, and in a few minutes, you will be able to access your website with HTTPS.
If you are planning on purchasing an SSL certificate from another vendor, you will first need to generate a CSR file to get the SSL certificate issue. In that case, please follow these steps:
- Go to the SSL/HTTPS section.
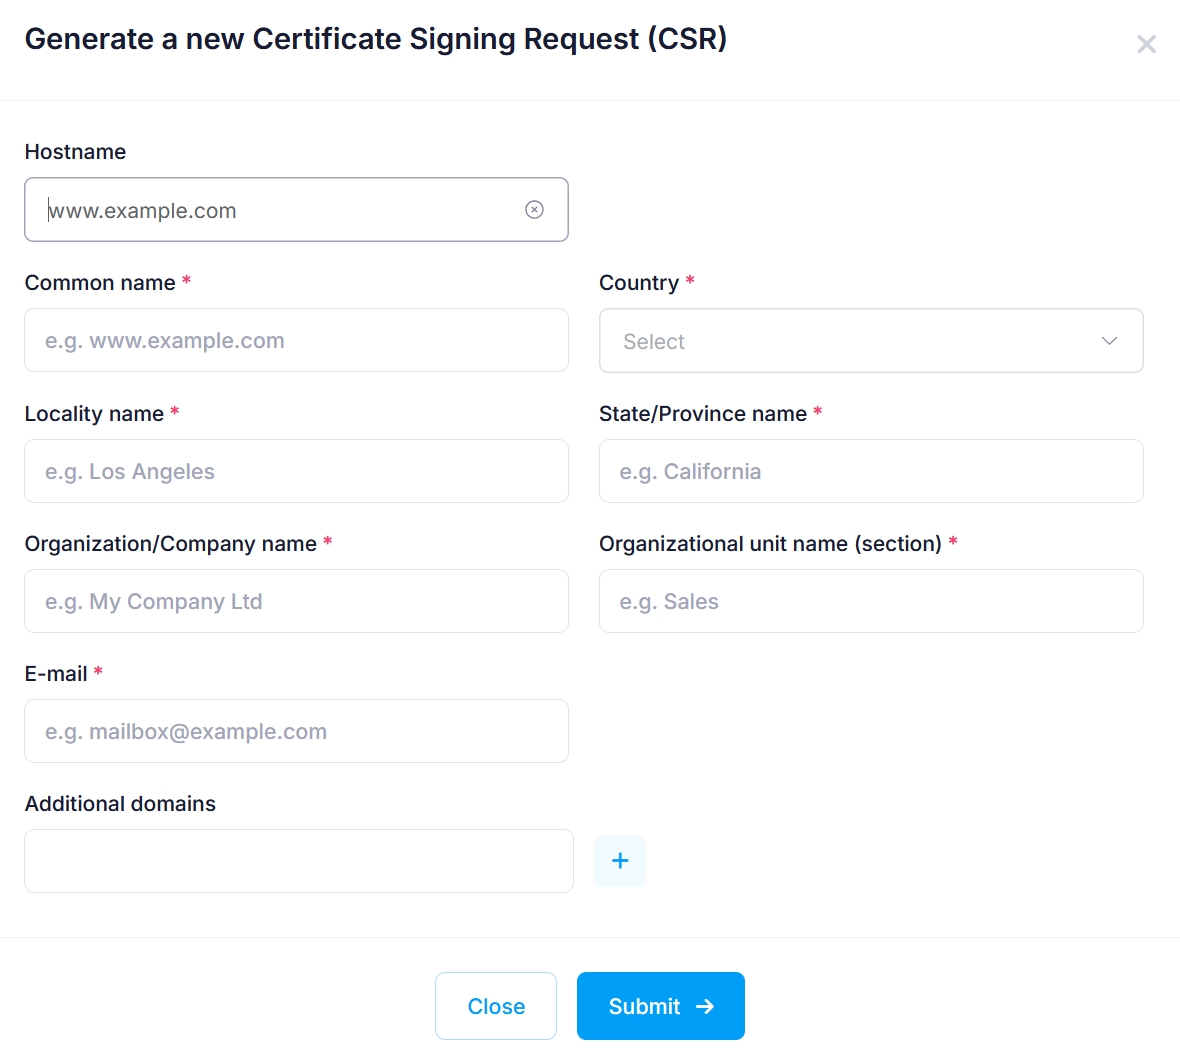
- Generate a CSR for the certificate on our server by clicking on the Create CSR button at the top right of the list.
- On the next page, choose the domain name from the drop-down menu. Then fill in the rest of the information using the placeholders in the fields as a guide.

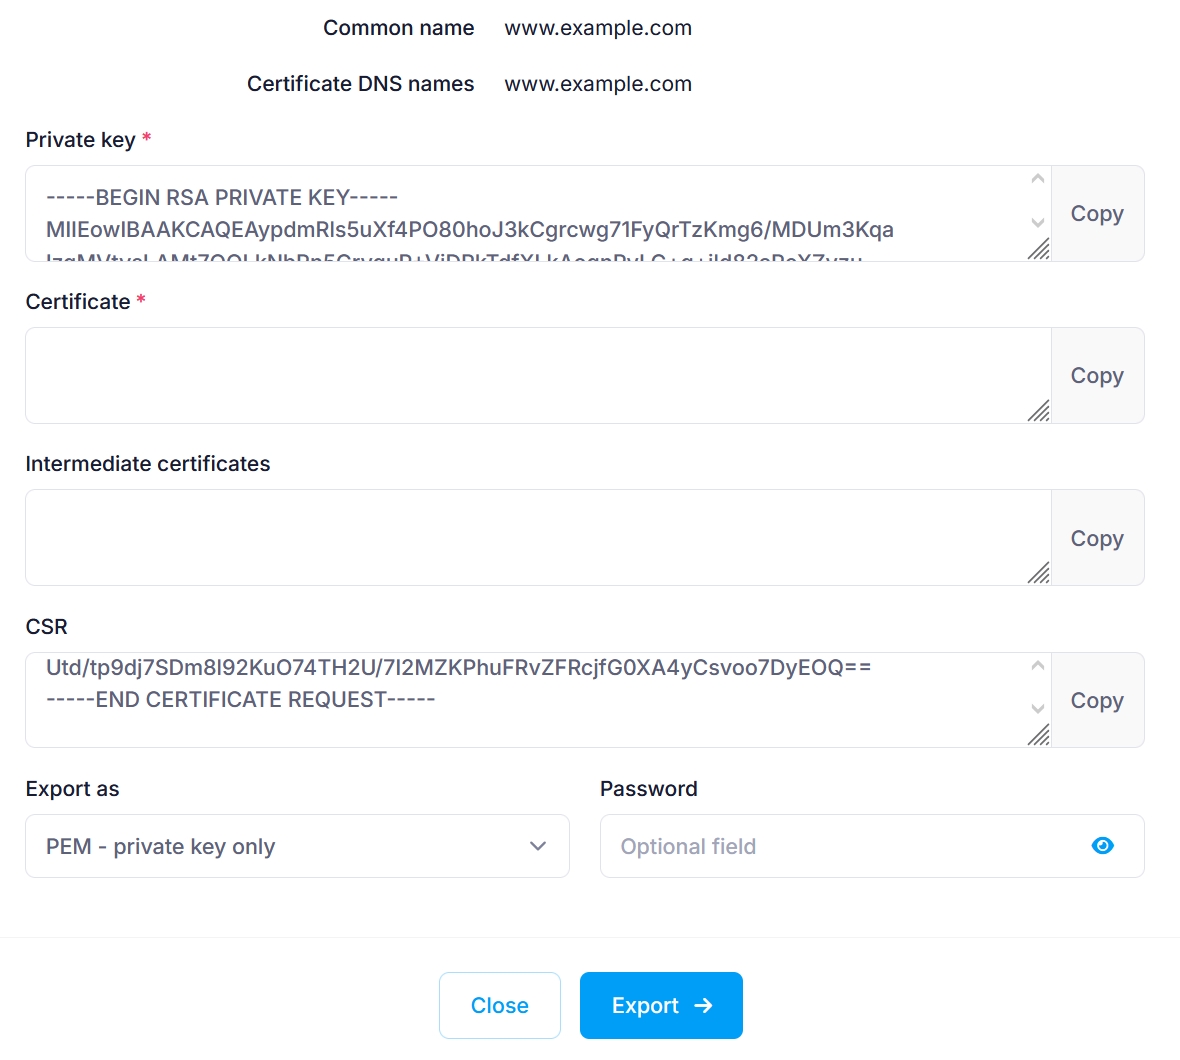
- The CSR will show up in the list. Click on the gear icon button from the Actions column next to it, and click View/Export.
- Copy the CSR to your clipboard using the Copy button on its row. Please make sure that you copy the CSR, and not the private key. The private key should not be provided to third parties due to security reasons. You need to provide the CSR to your SSL provider. They will generate the SSL certificate based on the CSR information.

- Once you have obtained the SSL certificate and the intermediate certificates from your SSL provider, please head back to the SSL certificates page and select Upload certificate for this CSR from the Actions column for the CSR.
- Paste the SSL certificate and the intermediate certificates in the Certificate and Intermediate certificates fields, or upload them using the Upload buttons. Click on the Submit button to save the SSL certificate.
- The last step is to enable the certificate by clicking on the gear icon from the Actions column and choosing the Enable option. This will activate it, and in a few minutes, you will be able to access your website with HTTPS.
Installing free Let's Encrypt SSL certificates
If your hosting provider offers the ability to install Let's Encrypt certificates, you can refer to the Installing and deinstalling a Let's Encrypt certificate article for more details.