

When you open a website, you may or may not like its design, but you probably don’t think about what stands behind that design. Adding text and images is easy; the more difficult part is to know where exactly they will be positioned and how exactly they will look. Many websites are built using PHP and/or HTML, but these languages do not provide any means to format the style of the content. HTML is designed only to describe the content of a page, but not its look. This is where CSS, or Cascading Style Sheets, comes into place.
- What is CSS
- Short history
- Types of CSS
- Advantages of using CSS
- Syntax
- Minify CSS
- Adding custom CSS code
- Wrap Up
What is CSS

CSS is a rule-based language that is used to specify the style of certain elements on a given web page. Rule-based means that the website owner creates groups of rules that are applied to these elements. In other words, CSS is a design language that is used to manage the way a website looks. It can be used for simple tasks such as specifying the font size, but as you will see below, it includes some advanced functionalities as well.
CSS allows website creators to separate content from presentation, making it possible to edit either one separately. This is something important as it allows both site owners and web developers to focus on one or the other, which facilitates their work.
Short history

CSS was created in 1994 by Håkon Wium Lie, a web standards activist. Back then, he worked at CERN with Tim Berners-Lee, the creator of the World Wide Web, so he had good insight into HTML and the first websites. In 1995, he joined W3C (World Wide Web Consortium), the international standards organization for the Web, which was created by Berners-Lee. There, he worked with Bert Bos, a computer scientist, who created the Argo web browser as a test application for CSS. Together, they created the CSS1 (1996), CSS2 (1998) and CSS3 (1999) specifications.
The work of Håkon Wium Lie as a web standards activist has led to a number of significant changes in the World Wide Web. He campaigned for browsers to support downloadable web fonts, for easier video publishing (essentially proposing the <video> HTML tag for websites), and for printing directly from the Web, instead of copying content to a text/image editor first.
CSS1 allowed web developers to specify font properties, background color, text alignment, padding and basic positioning of different elements.
CSS2 expanded the above functionalities by adding relative, absolute and fixed positioning, and media types – different styles for screens, printers, etc.
CSS3, with some minor revisions, is the current specification. Unlike the previous versions, CSS3 does not include a single set of features. Instead, it is divided into different modules, each one including various features. CSS3 includes things such as transitions, shadows, embedded fonts, rounded corners, and responsive design. As some modules are changed independently, some people refer to the latest updates of CSS3 as CSS4.
Grid and Flexbox are two modules that have significantly gained in popularity lately as they allow responsive web pages to be created without using floats and positioning. The modules are an example of the robust features you can have with CSS. The Grid Layout Module allows you to create a grid of rows and columns, which are suitable for large-scale layouts, while the Flexible Box Module allows you to add flex containers, which makes it better for small-scale layouts. The two modules can be used together. All modern browsers support them, both on desktop and mobile devices.

Types of CSS
There are different ways to add CSS code to your website. You will come across all of them, but some are way more common than others (and for a reason):
- External – All the CSS code is placed in a single .css file in the website root directory or a subdirectory. The site files load the required CSS code as needed from that file. This is the best option if you want to optimize your code as the site core files will not include any design customizations, but only functional code. Using a single file also makes it very easy to apply updates to the design across the entire site with minimal code changes.
- Internal – The CSS code is added to the header of each file. This option is not very common, but it can be used for websites that are not updated often in terms of their design. The advantage here is that the CSS code can be updated safely on a given page without affecting the rest of the site pages. Even if something goes wrong on that page, the other pages will remain intact.
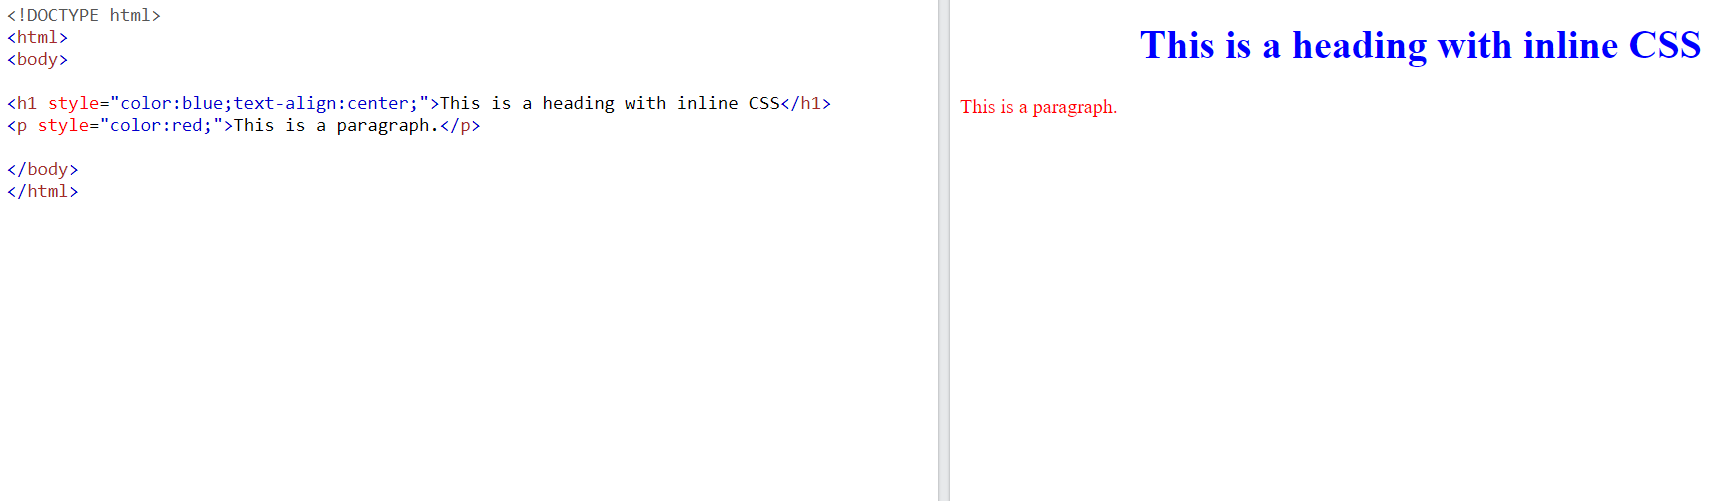
- Inline – CSS code snippets are added directly in the code wherever they are needed. This way, CSS code is added for each particular element of the site. Here is an example of a heading with inline CSS code: <h2 style=”font-size:20px;color:red;”>This is a headline.</h2>. This is a very unpopular approach nowadays as adding inline code is very time-consuming. Updating such code will be very difficult as you will have to go through the entire code of the site to make changes. This is why using inline code is very impractical if you have more than a few pages.

It is important to know that if you use more than one approach, the inline CSS code will have the highest priority, then comes the internal/external code, and finally, the browser default style.
Advantages of using CSS
- Saves work. You can create and maintain less code to style your website. Less code means less chance of errors.
- Saves time. If you use the same elements across the site, it will be very easy to update their style. You will save a lot of time updating a single value compared to updating the same code on multiple pages.
- Preserves consistency. If used well, a single stylesheet can be used to style all the elements on a website. This way, if you add a button on multiple pages, for example, it will look the same on all of them.
- Saves bandwidth. Browsers usually cache external stylesheets, so they don’t have to reload the code over and over again when users browse different pages. CSS files are relatively small, but the more visitors you have, the more bandwidth you will save.

- Supports different devices. This is something quite important as CSS allows you to have different styles for different devices (desktop, mobile, print). This way, you can provide a version of your pages that is not only responsive but is also accessible i.e. any unneeded advertisements and navigation elements can be hidden to make it easier for screen readers to go through the page content.
Syntax
Here we will show you only the very basic CSS syntax along with a few examples. We cannot add a full tutorial in a blog article as there are multiple modules with lots and lots of functionalities, but if you are interested, you can check out resources like https://www.w3schools.com/css/default.asp or https://www.quackit.com/css/examples/. There, you can even write and test your CSS code.
As we mentioned, CSS is a rule-based language. A rule consists of two parts – a selector and a declaration block. The selector is the HTML element you want to style. The declaration block includes a CSS property name and a corresponding value, separated by a colon.

You can add multiple declarations in a single block. You only have to separate them with semicolons and surround the whole block with curly brackets.
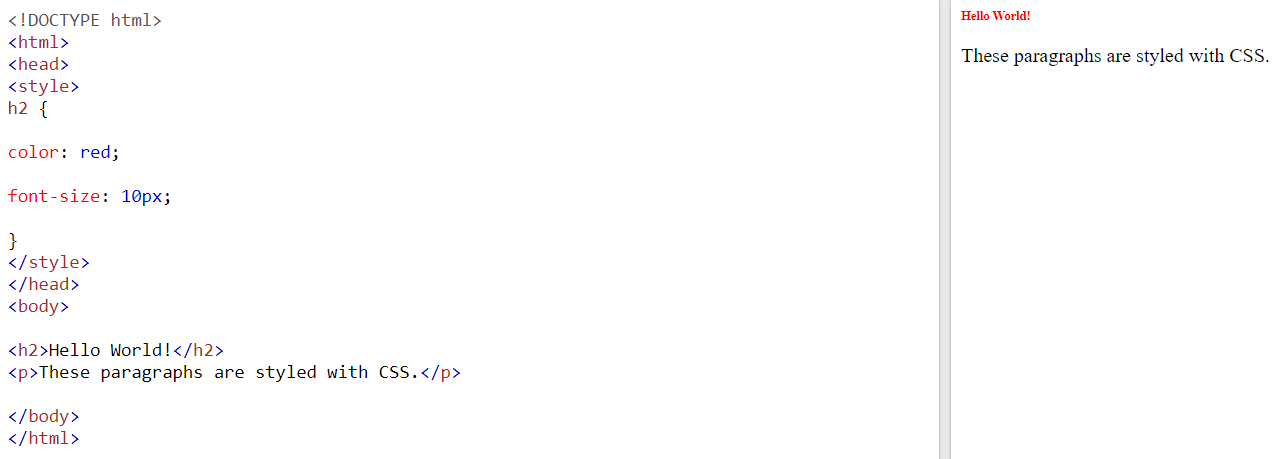
h2 {

color: red;

font-size: 10px;

}
If this sounds complicated, here is an example that will show you how easy CSS actually is:
In this example, all “h2” elements will be red and will have a font size of 10px. Here is another example where all “p” elements will be blue and will be aligned to the left:
p {

  color: blue;

  text-align: left;

}
Here are a few more examples that can show you some of the things you can do with CSS. Add a background image for a textbox:
{

background-image: url('/images/background.png');

width: 20px;

padding: 30px;

border: solid;

}
Add a rule only for specific screen sizes:
@media only screen and (min-width: 768px)Add a hover effect to a button:
button {

  color: #016898;

}

button:hover {

  color: #19B5FE;

}
Minify CSS
CSS code is often minified. The minification involves removing comments, spaces, and new lines, as they are not required for CSS code to work. Formatting is used to make the code human-readable as it is easier to write, debug and maintain, but web browsers and applications simply do not need such formatting.
There are two reasons to minify the code. The first one is that the CSS file size can be reduced significantly, which can speed up your site a bit as the browser will execute a smaller file. Simple sites use less CSS code, but larger ones can have a more extensive CSS file, and the problem comes from the fact that browsers pause HTML parsing while they load all external CSS links. The second reason is that minified code is harder to read and copy, and this is a way for some web developers to “obfuscate” that code as an attempt to make it harder for a third party to copy it.
Some web applications minify the CSS code by default. For others, you will have to use a plugin/extension. If needed, you can use a free online tool as well, such as https://www.toptal.com/developers/cssminifier or https://www.cleancss.com/css-minify/.


Adding custom CSS code
If you are building a website from scratch and you are writing the code manually, you don’t need a tutorial on how to add CSS code as you know what you are doing. If you don't have much experience and you use a template for an online site builder or a content management system, however, you can still edit the template CSS code or add custom code. To do that, you should find the style.css file of the theme, or you should look for an option to add the custom code using your dashboard. As you will see, it is easier to edit/add code with some applications than with others. Here are a few tips on how to add/edit CSS code with some popular applications.

- ICDSoft Website Builder. To make sure that changes are not lost when the application is updated, add your custom code only through the dashboard. Once you log in, go to Design -> More Settings -> Custom code. Just make sure that you add the code between tags.
- WordPress. There are different ways to add or edit CSS code in WordPress. You will find the entire stylesheet of the theme you use in the site directory -> /wp-content/themes/theme-name/style.css . If you want to edit this file directly, we recommend that you back it up before that.
If anything goes wrong when you make changes, we have your back. We keep daily backups of all your content for 7 days for shared plans, and for 15 days for VPS plans, but our Extended Backups upgrade will give you access to regular backups for a whole year. You can also use our WordPress Toolkit to create on-demand backups of your WordPress websites.
Some themes come with a dedicated section where you can edit many more theme-specific options compared to the default settings that WordPress allows you to edit. Almost all such themes include the option to add custom CSS code in that section. The code you add will have priority over the theme default CSS code for the elements you want to edit.
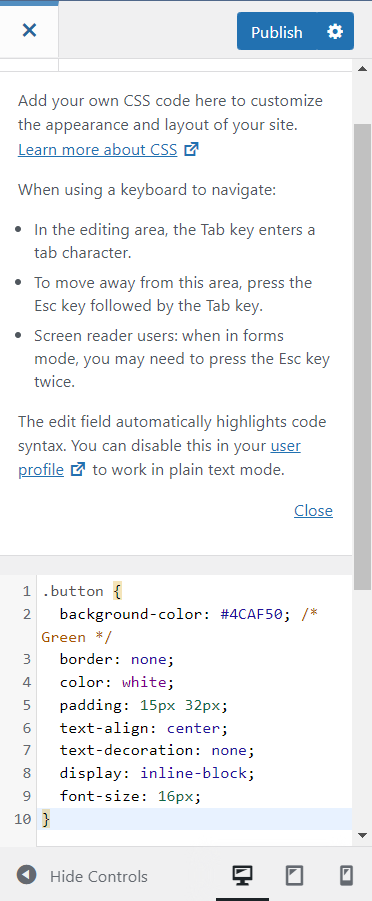
Alternatively, you can use a plugin that will allow you to add code easily. A few examples of such plugins are Simple Custom CSS and JS, SiteOrigin CSS, and Simple Custom CSS Plugin. To minify CSS code, you can use Hummingbird, Autoptimize, or WP-Optimize.
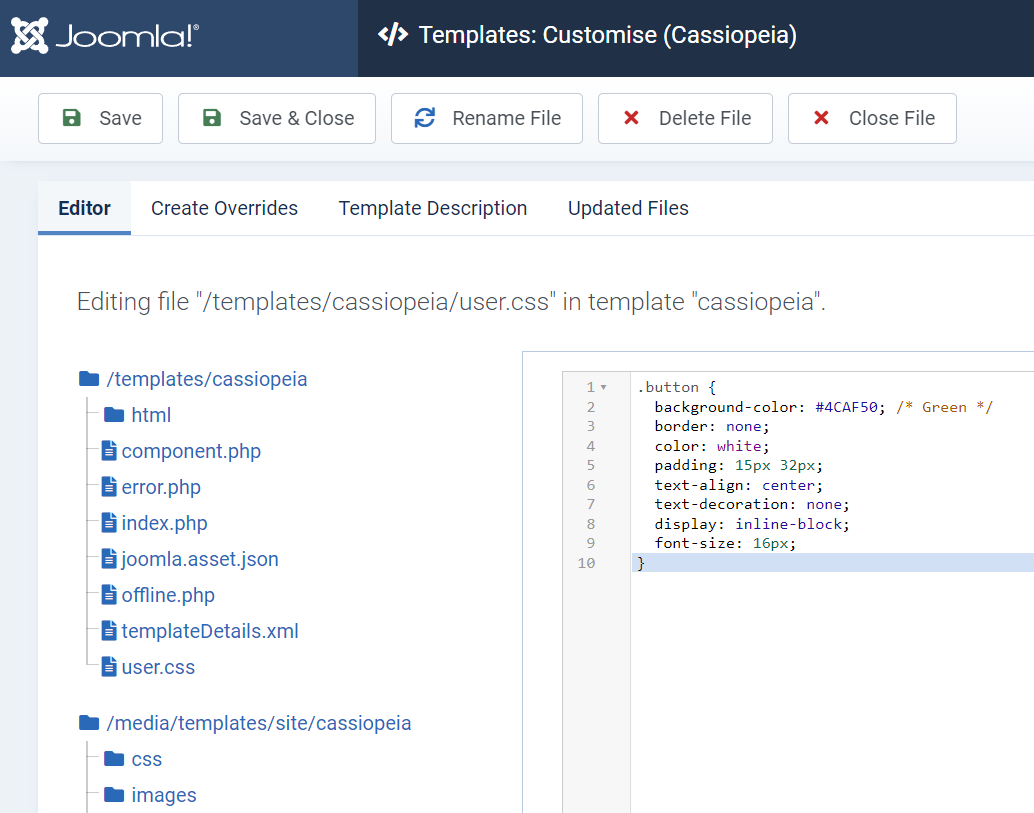
- Joomla. Once you log in to the dashboard, go to System -> Site Templates -> Details & Files -> click on New File on top and select the CSS folder in the left pane that you will see. Name the new file user.css and type/paste your CSS code. If the template you use doesn’t have such an option, you can use an extension like Custom CSS, Head CSS Script, or XTypo.
- Prestashop. The best option is to use a module such as ClassyDevs Custom CSS & JS. Adding CSS code manually requires more advanced knowledge as you will have to edit core theme files apart from creating a custom .css file. If you have the skills to make the necessary changes without a module, you probably don’t need a tutorial.
- Opencart. Similar to other applications, you can edit the stylesheet directly if you go to / catalog/view/theme/your_theme/stylesheet/stylesheet.css, or you can use an extension such as “Custom JavaScript and CSS”. Make sure that you clear the application cache after you edit the code, otherwise the changes will not be applied.
- Drupal. You can edit the CSS files of the theme you use if you go to the site root directory -> /sites/theme-name/files/CSS. You should have good knowledge of CSS though, as the code is minified and it is hard to edit it. If you prefer a more user-friendly option, you can install a module such as Extra CSS and JS (adds inline CSS), Live CSS, or CSS Editor.
Wrap Up
Using Cascading Style Sheets is mandatory for any website these days. Of course, a website can run without CSS, but it will surely not look pretty at all. Content is important, but the style can help a lot to create a great user experience. This is why, you should not neglect the style of the site elements, especially if there is an easy fix in the CSS code for some issue you have noticed or an easy way to customize some element.
Apart from making a website look good, using CSS has several advantages. It can save you a lot of time when you build your site or update its style, it can make the site look good on different devices, and it can even save you and your visitors some bandwidth. Don’t forget to minify the code for even better results if such an option is available.


 – Improved Email Forwarding")
