DMARC Protection
| DNS records added via the DNS Manager section of the Control Panel take effect only when the domain name uses the DNS service of your hosting account. |
General information
Domain-based Message Authentication, Reporting & Conformance (DMARC) is a system of DNS records that extends the functionality of DKIM and SPF by allowing domain owners to set policies for messages that fail authentication checks. DMARC also allows the ability to specify where and if reports of such failures should be sent. If there is a DMARC record for your domain, all recipient servers that check such records will know what to do with messages that claim to be coming from your domain, but fail authentication checks. Please note that a DMARC record does not reduce SPAM sent to YOUR domain; instead, it instructs recipient servers on how to handle messages that fail authentication checks.
A commonly used DMARC record is:
v=DMARC1; p=none;"v=" defines the version of DMARC used. The "p=" string at the end specifies the policy that should be used for the domain.
Detailed information about DMARC is available at https://dmarc.org/.
Adding a DMARC record through the DMARC protection tool
To add a DMARC record for your domain name, please follow the steps:
- Go to the DNS Manager section.
- Click on DNS Settings.
- Click on Enable next to DMARC protection.
The DNS Manager section of the hosting Control Panel allows you to add a DMARC record for your domain with a single click. Just use the Enable button in the DNS Settings section.

This will automatically add the following DMARC TXT record in the DNS records section:v=DMARC1; p=none;
The DMARC record above specifies that no particular policy for bounced messages should be used. Since most email providers simply require the existence of a DMARC record, this record should be sufficient to increase the deliverability of the messages you send.
Removing the DMARC protection by clicking the button Disable next to it would remove the existing DMARC record for your domain.
Adding a DMARC record in the DNS Manager manually
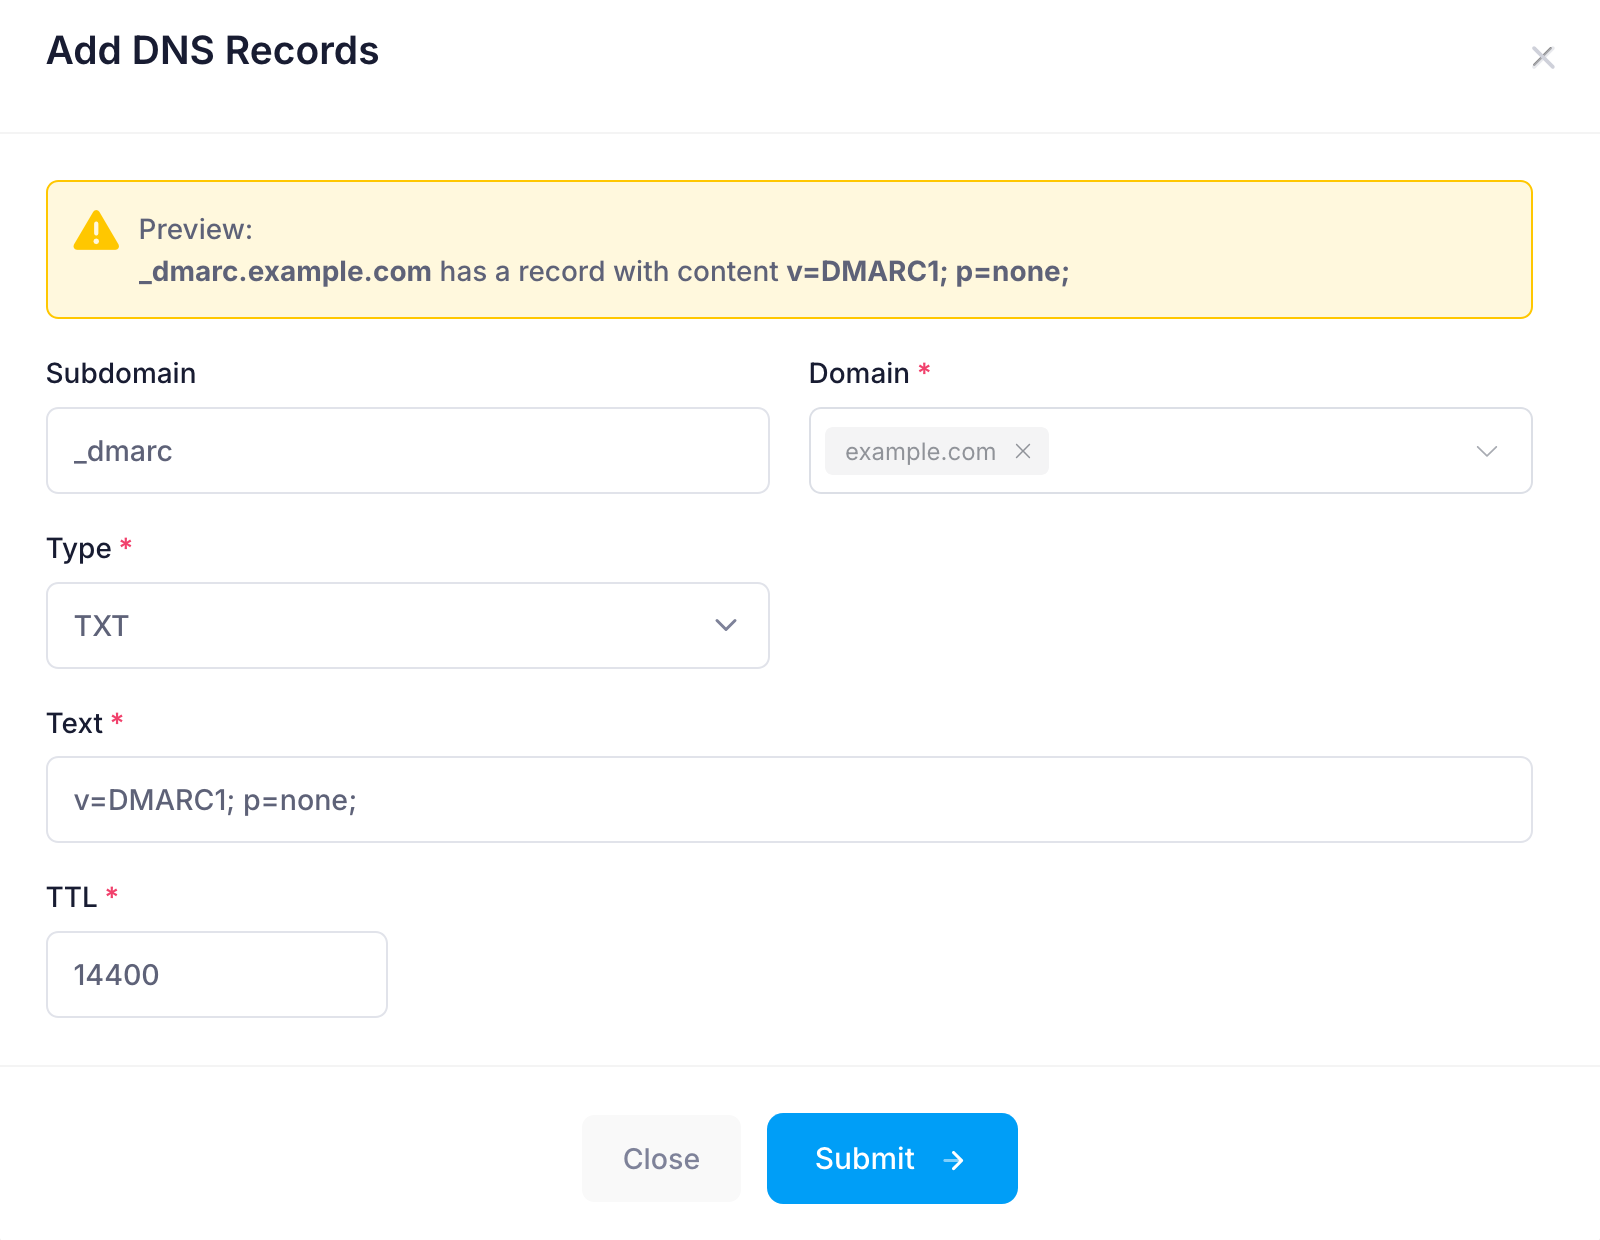
If you are an advanced user, you might wish to add a different DMARC record for your domain. The hosting Control Panel's DNS Manager section allows you to add a DMARC record manually. To add a DMARC record, you need to:
- Go to the DNS Manager section.
- Click on the Create button to the right of the interface.
- Fill in the following fields:
Subdomain: Set to _dmarc unless provided another subdomain.
Domain: You can choose to apply the changes to one or more domain names through the Domain selector.
Type: Choose TXT from the drop-down menu.
Text: Type your desired DMARC record.
TTL: This is the time-to-live value of the record. The default is 14400 seconds. We would recommend leaving the default in most cases.
- After applying all values, click on the Submit button.