

When people talk about website content, they usually have text in mind. Will it be good enough? Will it have the right keywords? Site content, however, usually includes image files as well. You will rarely come across a site that doesn’t have any images, or if you do, it was likely created at least a decade ago. Images are important for the overall user experience as they help people perceive the content faster and easier. They can make your website look unique, so you should pay attention to the images you add to the site.
What matters, even more, is that images can impact the speed and the performance of a website. In this article, we will look at a few popular image formats and see which ones are suitable for a website. We will also give you a few useful tips on how you can improve the images on the site.
- Image formats
- WEBP
- PNG
- GIF
- JPEG
- BMP
- SVG
- And the verdict is…
- Tips on using images on your website
- Useful tools
- Finding images
- Compressing images
- Converting images
- Wrap up
Image formats
We will focus more on two formats – WEBP, which has been gaining in popularity lately, and PNG, which is already widely used on many websites. We will also look at a few more formats that are used across the Web, but not in so much detail as they are not that popular (and for a reason).
WEBP

This is an image format developed by Google in 2010 that uses the same technology that is behind the VP8 video codec. WEBP provides both lossy (removing some of the image data) and lossless (removing only non-essential data) compression, which reduces the image size significantly. The format is unique because it was developed specifically for website images.
You may not have heard of WEBP because the format was not widely supported until a few years ago. Google promoted it a lot, but for a long time, Chrome was the only web browser that supported it. Firefox added support in 2019, and Safari partially supports the format today. Internet Explorer does not support WEBP images (but it is quite outdated anyway, so if you use it, you should consider switching to a more modern browser). Today, browsers with around 95% market share support the format.

Use high-quality images. Regardless of the size of your images, they will have high quality. This will leave a good first impression when people come across your website.
Increase the site performance. Smaller images will load faster, thus decreasing the load time of your entire website.
Save bandwidth. The smaller size of the images means that they will use less bandwidth when people load your website. While you may use a hosting plan with a high bandwidth quota, or even an unlimited one, some of the site visitors may use a limited Internet connection. They will appreciate it that browsing your website will save their bandwidth. This is important if your website has a lot of images – a travel blog, or a photography website, for example.

Save space. Most web hosting plans these days come with generous disk space quotas, but if this is a factor, using WEBP can save a lot of space compared to other formats.

Display different types of images. WEBP is a universal format that was created with the idea to be the only format you need. This is why, it supports not only standard images but also transparent and animated images. This is the only format that supports both features.

Not supported by some applications. Not all browsers support it. WordPress 5.8+ comes with native support, but if you use an earlier version, you will need a plugin. This is valid for other software as well, including image editing applications. Photoshop, for example, started supporting WEBP images without an additional plugin in 2022.
Not supported by some platforms. While you can add a plugin to a CMS, you cannot do that to a cloud website builder. Some popular platforms like Squarespace simply do not support WEBP images, so you will not be able to benefit from the advantages of this format.
PNG
PNG, or Portable Network Graphics, is a lossless image format that was created in 1994 and adopted as one of the Internet Media Types in 1997. PNG was developed to address some drawbacks of the GIF format (more about that below).
Lossless compression. Quality is not lost regardless of how much you resize the image.
Supports true colors. Your site visitors will see the images with up to 16 million colors.
Supports transparent background. Before the emergence of the WEBP format, PNG was the only format that supported transparent and semi-transparent background. Considering that it is almost universally supported, it will not be easy to find a better solution if you want to add transparency to your images.
Accepted as an industry standard. Many applications use PNG as a default format for various purposes. A logo, for example, is almost always created as a PNG image.
Supports image interlacing. This is a quick download of the whole image to preview it with low quality, while the additional information is still being downloaded.

More suitable for text and graphics. The higher quality makes it easier to read charts, text, etc.
Does not support animations. If this is something you need, you will have to choose a different image format.
Larger than some formats. PNG being a lossless format comes at a price – the images are a bit larger than some other formats you can choose from. Nonetheless, PNG is smaller than many other formats and it may be worth using a bit larger image for better quality.
GIF

This format is popular for two things – animated images and the never-ending dispute about the pronunciation (hard or soft G), which you may have come across on some discussion boards. The abbreviation is short for Graphics Interchange Format. Created back in 1987 by computer scientist Steve Wilhite, GIF was the first color format for downloads, replacing the black-and-white formats used until then. The ability to loop animations was added in 1995, increasing the popularity of the format even more. Today, GIF files are used for graphics and memes, but you can still find them as regular images on many websites as well.
Supports animations.
Small file size.
Lossless.
Supported by all browsers.

Limited color depth. The format supports only 256 colors, so images will not look too good.
Cannot be edited. Once the image has been created, if you want to make a change, you have to start over.
Can be larger than other formats.
JPEG
JPEG, or JPG, is short for Joint Photographic Experts Group – the committee that created the format in the late 1980s. The format is very popular as it is the default format used by many cameras and printers. It is also popular for websites as it can display rich colors, which makes it suitable for photographers that create online portfolios. Of course, many people simply upload the images they have taken without converting them, so JPEG is one of the more widely used formats on the Web.
The disadvantage of using JPEG is that the format is lossy, so if you reduce the size of an image, you will get an image with worse quality. Good-quality JPEG images are usually significantly larger compared to other formats.


BMP
The bitmap (BMP) format is used to store monochrome and color images with various color depths. The format is suitable for storing real-world images with very high quality. This comes at a price, though. BMP images are very large, so they are very unsuitable for websites. Unless there is a good reason to do that, using BMP images on your site is a big No. A single high-quality bitmap image can be larger than the entire page it was added to.


SVG

SVG, or Scalable Vector Graphics, appeared back in 1999. Vector formats allow infinite scaling of the entire image or just parts of it without losing any quality. They are based on mathematical formulas and not on pixels.
SVG images are supported by all browsers and can be zoomed without compromising the quality. The more elements you add to the image, the larger it gets, though. Using SVG images can slow down your website since the entire image must be loaded first. This is why, images are used primarily for menu icons and sometimes for the site logo, but not for images on the site pages.

There are other image formats as well, but they are not designed for websites, so web browsers will not load them as image files. You can work with them using image editing software and use them for various other purposes, so we will not mention them in our article.
And the verdict is…
Considering the information above, you should use either WEBP or PNG images on your website. Both formats offer excellent quality regardless of the size of your images and both support transparent backgrounds. They can both save you some disk space and bandwidth and can improve the overall performance of your website.
Of course, depending on the purpose of the images you want to add, you can use a different format as well. JPEG, GIF and SVG images are still quite common. Consider what you will use the images for and how many they will be on a given page. Do you want to add a logo, or do you want to add an animated image? Do you need only a few images along your text, or do you plan to add an entire gallery? Some formats are clearly better than others for certain purposes. If your entire web page is let’s say 2 MB in size, you should not add a 4 MB bitmap image on it. Regardless of the format you choose, you should always put the user experience and the overall satisfaction of your site visitors first.
Tips on using images on your website

- Improve SEO by using proper names. Search engine optimization is not only about the text. Using proper names and alt tags for your images can bring you some extra traffic as well. Try to use descriptive names for your images, such as large_pink_flower.png instead of image001.png, for example. This way, the image is far more likely to appear in image search results, and from there, people will probably end up on your website.
Proper image names are often ignored by most website owners, and this is a missed opportunity. The same is valid for alt (alternative) tags – this is an HTML attribute that appears if an image cannot be loaded properly for some reason. Usually, this will be a short description of the image so that people will know what is supposed to appear in the image box. Some search engines look at alt tags as well, so you can give your site a small SEO push if you spend some time adding the proper text for each image.

- Compress images (but not too much). When it comes to compression, some image formats are superior. You can choose the most suitable format based on some objective criteria. You should consider the actual size of the images as well, though. If you have a large image, resize it as much as possible without compromising its quality. Do not add it as it is, relying on the visitors’ web browsers to resize it when they load the page. While they will do that and they will display the image properly, they will have to load it first with its original size and dimensions. This will diminish any advantage of using a good format and displaying a small image on the page.
This is why, you should consider compressing your images to a certain level – make sure they look good on the site, but also when they are opened as standalone images in a new tab. Each standalone image can be a little larger than what it appears on the page it is a part of.
- Use lazy loading. If you use this technique on your website, images will be loaded once visitors reach them, but not before that. If you have more than a few images on a given page or several large images, it will take longer for the whole page to load as all images will be loaded once the visitor opens the page. With lazy loading, only images in the visible area of the page will be loaded. The other images will be loaded only after the visitor scrolls to them. Using this technique will speed up your site, decrease the overall load and save some bandwidth for both you and your visitors.

- Use relevant images. Any content you add should be there for a reason. You will not add random text on your site, so you should not add random images either. When you add a new image, ask yourself if this is the right place to add it and if this particular image is the right one to add. Relevant images are more likely to grab the attention of your visitors and their description is more likely to give your site the small SEO boost we mentioned earlier.
- Use unique images if possible. Sometimes it is perfectly fine to use stock images as they will fit well with the rest of your content. If you need a background image for an article, for instance, a stock image is a great choice. In all other cases, however, you should try to use unique images. People can easily spot the stock ones, so using unique images can make a difference in the way visitors perceive your website. Unique images mean unique content; stock images may make them doubt if your text is genuine or not.
Useful tools
You will find lots of useful tools online that you can use to find and manage images for your website. We have listed some of them below. None of the tools require installing any software on your computer.
Finding images
Depending on what you need images for, there are different ways to get them.
The best option is to take them yourself or to hire a photographer. This way, you will have unique images that are taken exactly the way you need them – nothing less, nothing more. They will be from the right angle and will include only the content you need – it may be a dish for a restaurant website or a landmark for a travel blog, for example. Unique images can add value to your content.
If you do not need a unique image, you can use an image portal. You will find free and paid images online. Here are a few such portals:
Our Website builder comes with built-in image and illustrations libraries. You can choose between thousands of free and professional images and graphics, and add any of them with a few clicks. Any image you add/purchase will be added to your gallery right away, so you can use it across the site.


If you want to create infographics, you can use tools like:
Compressing images
There are different ways to compress an image. If you use WordPress, for example, the easiest way is to use a plugin like Smush, EWWW Image Optimizer, or TinyPNG. If you are building a custom website or the platform you use doesn’t support compression modules, you can use an online tool:

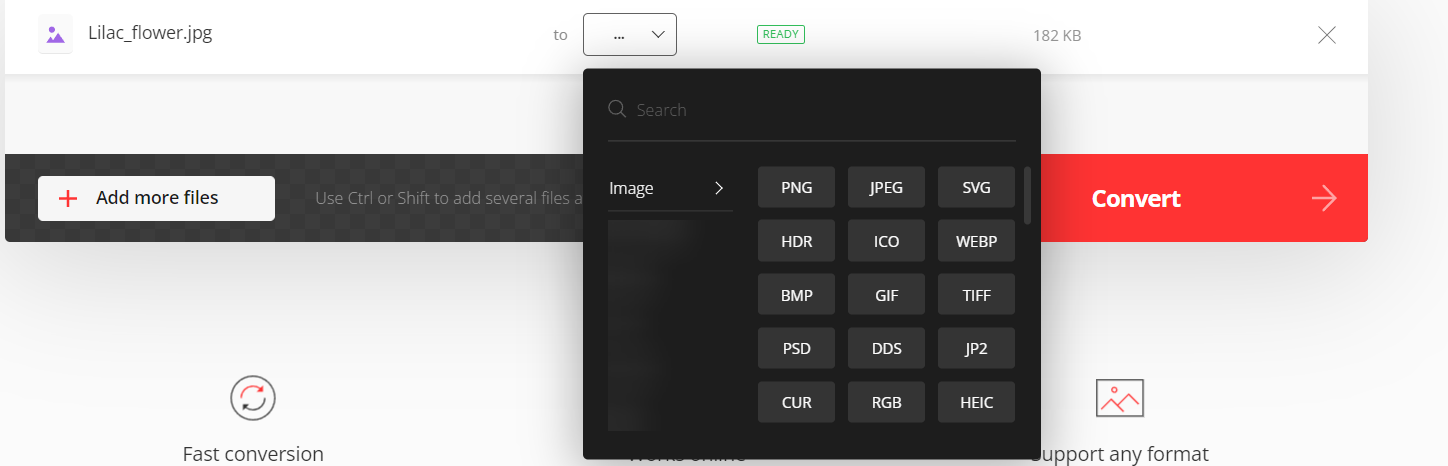
Converting images
You can easily convert your images from one format to another. Using software on your computer will probably be more convenient, but if you don’t have the option to install software, you can find everything you need online. Have in mind that depending on the input and output formats, images may lose some of their quality.
https://convertio.co/image-converter/
Wrap up
You should pay attention to the images on your website. They can be as important as the rest of your content, or even more important if most of your content is images. There are different formats you can choose from, so which one you will use depends on the purpose of the images. One format is more suitable for a logo with a transparent background, another one may be more suitable for high-quality photographs or menu icons. If two or more formats are suitable, weigh the pros and cons of each one.
Make sure that you use relevant images, and if possible – unique ones. If you want to improve the performance of your website, compress the images to a suitable size and use lazy loading. For a small SEO boost, do not forget to name all images appropriately. After all, you should use every opportunity to get ahead of your competitors.


")

